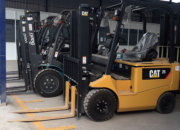
In the logistics and freight-handling industry, container forklifts are indispensable “workhorses” that directly determine operational efficiency and project timelines. To keep these powerful machines running reliably and at peak performance, regular maintenance is absolutely essential. Among all maintenance tasks, replacing the engine oil filter and air filter are two fundamental yet critical procedures that greatly impact the engine’s overall “health” and longevity.
Why Regular Filter Replacement Matters
Many operators pay attention only to oil changes but overlook the importance of the filters. This is a costly mistake that can lead to severe engine damage and expensive repairs down the line.
1. Engine Oil Filter – The Heart of the Lubrication System
Function:
The oil filter acts as the “lungs” of the lubrication system. Its main job is to capture metal shavings, soot, and other impurities generated during engine friction, ensuring that only clean oil circulates through vital moving components.
If not replaced:
A clogged oil filter will trigger the bypass valve, allowing unfiltered oil to continue circulating in the engine. This contaminated oil, full of abrasive metal particles, will quickly wear down the pistons, cylinders, and crankshaft. The result: overheating, reduced power, sluggish performance, and eventually, catastrophic engine failure.
Recommendation:
Replace the oil filter every 250–500 operating hours, or together with each engine oil change. Always follow the forklift manufacturer’s specific service intervals.
2. Engine Air Filter – The Shield Protecting the Combustion Chamber
Function:
If the oil filter is the lungs, the air filter serves as the “mask” protecting the engine from contaminated air. It prevents dust, sand, and airborne particles from entering the combustion chamber. Clean air is vital for optimal fuel combustion and power output.
If not replaced:
A clogged air filter restricts airflow, disturbing the air-fuel ratio. This leads to incomplete combustion—manifested by poor acceleration, reduced engine power, higher fuel consumption, and black exhaust smoke.
Recommendation:
Inspect and clean the air filter regularly. Replace it every 1,000–1,200 operating hours, or sooner if the forklift works in dusty environments such as ports, cement plants, or construction sites.
Preparation and Safety – The Key to Effective Maintenance
Before starting the replacement procedure, proper preparation ensures a smooth, efficient, and above all, safe process.
1. Safety First
Position: Park the forklift on a flat, solid surface.
Secure the vehicle: Engage the parking brake and fully lower the forks to the ground.
Cool down the engine: Shut off the engine and wait at least 30 minutes to allow the oil and components to cool.
Personal protection: Always wear oil-resistant gloves and safety goggles during maintenance.
2. Required Tools and Materials
Tools:
Oil filter wrench (strap or cap type)
Socket wrench set for drain plug removal
Oil drain pan or container
Clean funnel for refilling oil
Clean industrial rags
Materials:
New genuine oil filter (correct model)
New genuine air filter (correct model)
Engine oil of the correct grade and capacity, as recommended by the manufacturer
Important Note:
Always use OEM (Original Equipment Manufacturer) or high-quality aftermarket parts from reputable suppliers. A low-quality filter can cause more serious and costly damage than any short-term savings might justify.
Step-by-Step: How to Replace the Oil Filter
Step 1: Drain the Used Engine Oil
Locate the oil drain plug at the bottom of the engine. Place the drain pan directly underneath, then use a socket wrench to loosen and remove the plug carefully—hot oil may spurt initially.
Step 2: Remove the Old Oil Filter
Identify the old oil filter (a metal cylindrical component attached to the engine block). Use the oil filter wrench to loosen it counterclockwise. Once loosened, unscrew it by hand, keeping it upright to prevent oil spillage.
Step 3: Install the New Oil Filter
Apply a thin layer of fresh oil to the rubber gasket on the new filter—this ensures a proper seal and prevents gasket tearing. Hand-tighten the filter until the gasket contacts the mounting surface, then tighten an additional ¾ turn using the wrench. Do not overtighten.
Step 4: Refill Engine Oil and Check for Leaks
Clean the drain plug area, reinstall the plug securely, and pour in new engine oil using a funnel. Start the engine and let it idle for 1–2 minutes to circulate oil through the system and filter. Turn off the engine, wait 5 minutes, and recheck the oil level with the dipstick. Add more oil if necessary. Inspect for any leaks around the drain plug or filter.
Step-by-Step: How to Replace the Air Filter
Step 1: Locate and Open the Air Filter Housing
The air filter housing is usually a large metal or plastic box connected to the intake duct. Unfasten the clips or bolts securing the cover.
Step 2: Remove the Old Air Filter
Lift out the old air filter element (usually cylindrical or rectangular).
Step 3: Clean the Air Filter Housing
Wipe the inside of the housing thoroughly with a clean, damp cloth to remove dust and debris—this step prevents contaminants from entering the engine during reassembly.
Step 4: Install the New Air Filter and Close the Housing
Insert the new filter element correctly, ensuring it sits evenly and seals tightly. Close the housing and secure all clips or bolts. Double-check that the cover is fully sealed.


